Showing posts with label crafts. Show all posts

Wednesday, March 6, 2013

Monogrammed Door Decor


Want to create a personalized letter for your front door? Or make a lovely wedding gift for a couple that will finally share a last initial?  The possibilities for this Yarn Wrapped Letter are endless!

You'll need:

Wooden letter - available at most craft stores
Yarn - I used two different rolls of complimentary colors, one solid, one striped
Acrylic paint that matches your color scheme
Hot Glue Gun
Tape
Decorative Do-Dads


 Before I started with the yarn I painted the letter in a light green just incase the yarn couldn't cover all the corners.  (You will note that for a quick paint job, I don't bother using a palette that I'll have to wash)

Take an end piece of yarn and tape it as close as possible to the edge of the letter. The tape will help hold the end in place until you have wrapped it.

If you will be alternating yarn rolls, you will want to wrap a section and stop. If you are only using one color you simply continue to wrap until the letter is covered. You may have to go back over some parts, especially if you have a funny shaped letter, like a G.

If you are alternating yarns, wrap a few sections of one color and then go back and wrap with the next yarn roll.

 The corners and curves can be tricky! For this curve I wrapped in a V pattern, alternating from side to side so that it almost made a braid.  Once a section was wrapped, I put a small dollop of hot glue to hold the yarn in place.
**HINT: If you plan to put your letter on a door that gets a lot of sun, take a piece of scotch tape and stick it over the drop of glue, this will prevent the glue from heating up and sticking to your door!


 Once you have your letter wrapped, get out your decorative pieces and start playing around with the placement. Remember that this will be hanging so try to keep the weight balanced so your letter isn't crooked. Once you have settled on an arrangement it is helpful to take a quick photo.  You will have to take the pieces off so that you can glue them down in the appropriate layers, so having a photo of the intended arrangement can be helpful!
Once your pieces are glued, tie a small bow around the top section of your letter so you can hang it from a hook. If you have a letter that does not have a centered top (Y, U, I, L) you might find that attaching a hook on the back of the letter is the easiest. 


Hope you love it!

M.

Monday, December 17, 2012

Fast DIY Business Cards

The Problem: Need business cards fast!  The Solution: DIY!

A few weeks ago I was planning on attending a Crafts Fair.  I had ordered fancy business cards that were not going to be delivered in time and I really wanted to have a way to "tag" the wreaths I was selling and and have a way to spread my name. Also, let's face it, you feel pretty awesome when you can say "here, let me give you my card".  
I decided there was no time to have the cards done professionally, so I finally said "I can do this!"

First, I went to the store and grabbed a pack of Card Stock. I chose a multicolored pack that would cater to my indecisiveness and was more fun than a plain white pack


I had these two stamps that I've been dying to do something with, so I got them out.  If you're in a pinch your local craft store should have some basic stamps. If you have time, I definitely recommend browsing on Etsy!
  
Now, this is down and dirty business card making.  I am not proficient in the Adobe products (Illustrator/Photoshop), and my designer husband was at work, so I resorted to good 'ole Microsoft Word.  When you go to Word, start by figuring out what version you have  In Word 2003 or earlier versions, on the Tools menu, click Envelopes And Labels. In Word 2007 or later choose Labels from the Mailings tab.   On the Labels tab, click Options.  In the Labels Product list, click Avery Standard.   In the Product Number list, use 8371 or 5371.  This will allow you to use a business card template.   In the Address area, enter the address information for the business card.  
It will look something like this:
The only downside to using your fancy colored paper is that you will have to measure and cut the cards by hand.  I believe if you use the actual Avery Business Card Paper it is serrated.  The gridlines will not print so you will have to measure and cut your cards.  A standard business card is 2" x 3.5".

I made separate templates for my front and back and then reversed my printing so that the sides would match up.  

Once everything was printed, I took my stamps and got creative!

Here are my front and back views:
 DIY Business Cards just like that!  I love the multicolored cards and the charming stamps, they feel very "me"

M.


Sunday, October 28, 2012

Quick DIY Halloween Costume

Do you need a last minute Halloween costume? This quick DIY will have you looking spooky in no time!

What you'll need:
        Witch's Hat (I got this one at a craft store for $0.99!)
        Glue gun and glue sticks
        Assortment of fake flowers, garland, and any other funky pieces
        Newspaper

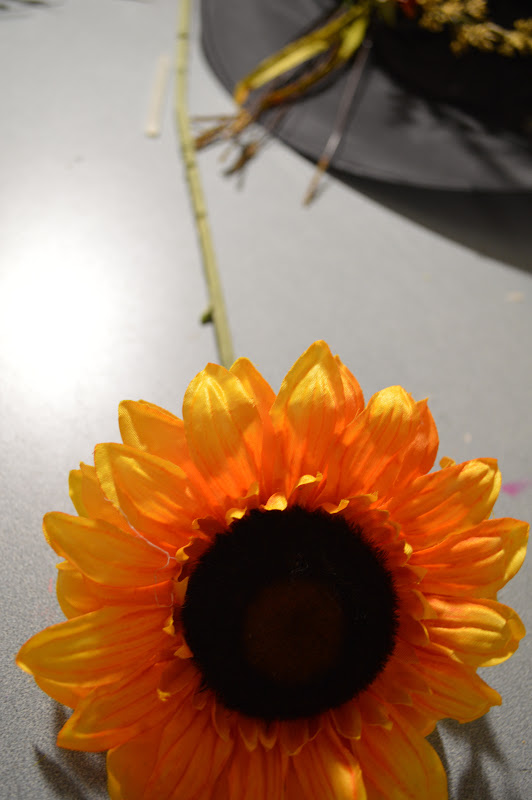
First, crumple up some newspaper and stuff it into the point of the hat.  We are going to make the hat pretty heavy so adding some newspaper will add some stability. Next, find a flower with a long wire stem.  Pull the flower off the stem and put it aside for later.  Slide the stem up into the hat and use some glue to secure the stem to the inside of the hat. I set the stem along the seam of the hat, the stem will act as a "backbone" for the hat.  I also added a few drops of glue to keep the newspaper ball in one place.
 Grab your glue gun and start gluing flowers, grasses, and other decorations to your hat!
 A little hint about fake flower bundles:  An individual stem from a bouquet can be made into a fuller bunch of flowers simply by sliding up from the bottom of the stem.  I did this for most of my pieces so that each piece had more body.

All ready to pass out candy!

Have a crafty Halloween!

M.

Tuesday, October 9, 2012

It's Etsy Time!

Well folks, I finally made it happen. I have opened an Etsy shop! For those of you who aren't already spending hours browsing Etsy for all it's vintage and handmade wonders, you really should! Etsy products are posted and sold by the artist or owner.  All products are Vintage or Handmade.  Warning: Once you start browsing on Etsy, it can be really hard to stop browsing! Who knows what treasures you will find!

You Can view my Etsy store here:  http://www.etsy.com/shop/SeeMollyCreate
You can also click on the links below!

Tuesday, September 11, 2012

Easy Organization for the Unorganized Artist


This DIY is for the busy crafter.  A quick & easy DIY that will take your art space (playroom, office, garage, etc.) from boring and blank to bright and colorful!

You'll need:
   Plastic bins
   Spray Paint
   Chalkboard paint
   Painter's Tape

I had these boring, clear, plastic bins that I got for about $1 each.
If you have read other posts that I've done, you know that I am a firm believer in the power of Spray Paint.  For this project, you'll need a spray primer and some fun colors.
Grab your drop cloth and start spraying!
Once the paint was dry, I taped off a section with painters tape.  Once the tape was down, I sprayed Chalkboard paint to make a space to write labels.  Once everything was dry all I had to do was fill the bins and place them on shelves! Viola! Insta-Chic way to revamp your space!


Just check out the difference this quick project made in changing the feel of this space:

Have fun!
-M.


Friday, August 24, 2012

From Classy Mirror To Funky Chalk Board!

Do you have a funky old mirror or frame sitting in a closet collecting dust? Re-purpose it and make a chalkboard message board!
 I had this awesomely creepy mirror that I have repainted endless times to match the latest decor.  I decided it was time to ditch the gloomy black paint and add a little fun!

You'll need:
Funky Mirror or Frame
Chalk-Board Spray Paint
Colored Spray Paint (and Spray Primer if going from dark to light)
Heavy Duty Magnets
Gorilla Glue
 Get out your drop cloth and head outside (or to a well ventilated space) It's hard to craft with a pounding headache from fumes!  Spray your frame and mirror.  *Hint: if your mirror is heavy, it might be easier to remove the glass and use something lighter like plastic or even heavy cardboard.


Once everything is dry, put the mirror back together.  My husband has never passed up the chance to use a screwdriver and screw so he was in charge of the hardware!
The couple who crafts together, stays together.
Next, we attached heavy duty magnets to the back of the mirror.  These magnets are the real deal. They came out of the hard drive of a computer. Super strong.  Stick them to the frame with Gorilla Glue. We used clamps and let the magnets sit in the glue until it had dried.

I decided to make a little basket to hold the chalk.  In the process I learned two things: 1) Buying sticks of chalk these days is waaay harder than I thought. 2) Apparently schools these days don't use chalkboards. So kids these days will never know the joy of eraser duty - smacking erasers together as a cloud of chalk dust covers you in a cloud and you struggle for air....anyways childhood problems..
 I got this little basket at a craft store and painted it with Folk Art Acrylic paint.
The only thing left to do is enjoy coming home to messages like this!  You could also write grocery lists and other productive things...but I have a sneaking suspicion we will use our message frame to play tic tac toe. 

M.

Tuesday, July 31, 2012

Heavy Metal Letter Meets Pretty Yarn Wreath


A while ago I got this awesome metal G on Etsy (click here for shop: Heavy Metals) I decided to make a yarn wreath for our front door and feature this great metallic piece!


What you'll need:
 14in foam wreath base
 Yarn
 Hot glue and glue gun
 "do-dads" for decorating your wreath
 Awesome Metal letter from Heavy Metals Etsy shop!


Start by wrapping the yarn around the wreath. This is the most tedious part. It takes forever.  Once you get into a groove it it's not so bad. Make sure you designate one side for show and one side for hardware, gluing, etc.  I glued the first end of yarn down so I didn't have to worry about holding it secure.


Once I had about 3/4 of the wreath wrapped in blue, I switched to brown yarn.  Again, I used a dot of glue on the back to hold the new yarn down.


Started gluing on the "do-dads"


I used a screw-in hook hanger on the back with a little extra glue to hold it tight (when in doubt add hot glue)


Finally, I used fishing wire to hang the metal G from the top of the wreath.  From afar, it looks like the G is floating!


M.

<a href="http://www.bloglovin.com/blog/3916391/?claim=kmyb8pe4q2e">Follow my blog with Bloglovin</a>
Related Posts Plugin for WordPress, Blogger...