Tuesday, July 31, 2012

Heavy Metal Letter Meets Pretty Yarn Wreath


A while ago I got this awesome metal G on Etsy (click here for shop: Heavy Metals) I decided to make a yarn wreath for our front door and feature this great metallic piece!


What you'll need:
 14in foam wreath base
 Yarn
 Hot glue and glue gun
 "do-dads" for decorating your wreath
 Awesome Metal letter from Heavy Metals Etsy shop!


Start by wrapping the yarn around the wreath. This is the most tedious part. It takes forever.  Once you get into a groove it it's not so bad. Make sure you designate one side for show and one side for hardware, gluing, etc.  I glued the first end of yarn down so I didn't have to worry about holding it secure.


Once I had about 3/4 of the wreath wrapped in blue, I switched to brown yarn.  Again, I used a dot of glue on the back to hold the new yarn down.


Started gluing on the "do-dads"


I used a screw-in hook hanger on the back with a little extra glue to hold it tight (when in doubt add hot glue)


Finally, I used fishing wire to hang the metal G from the top of the wreath.  From afar, it looks like the G is floating!


M.

<a href="http://www.bloglovin.com/blog/3916391/?claim=kmyb8pe4q2e">Follow my blog with Bloglovin</a>

Tuesday, July 24, 2012

Wedding Hints

The preparation for a DIY wedding is long, grueling, and messy.  In the end, however, a DIY wedding can give you the greatest sense of satisfaction and pride!  So why not use your homemade wedding decorations as Home Decor!? This is how I used some of our DIY decorations in our home.

 My wedding Bouquet

In the Wedding:

In our Home:
I put the bouquet on a vintage table we have in our dining room. It's a great conversation starter and I love looking at it every day!


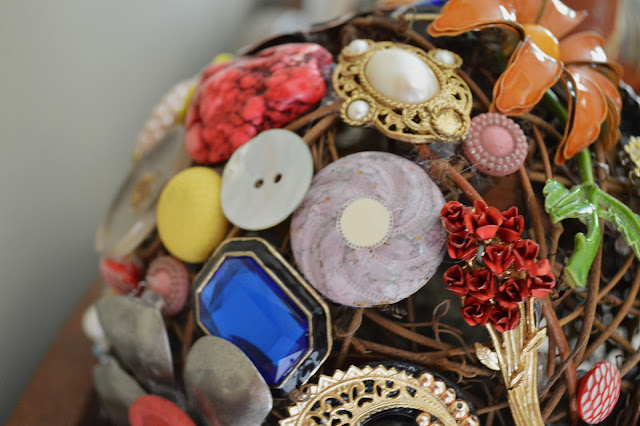
I loved the idea of a flowerless wedding bouquet because I didn't have to worry about preserving it after the flowers had died.  I crafted my wedding bouquet from vintage pins, broaches, and buttons that belonged to my grandmothers.  I have posted a detailed tutorial for making your own Vintage Wedding Bouquet.


This little door decoration was way to precious to throw out! So we put it at the bottom of the stairs for all to see!


A piece like this can be crafted for about $15!


Wedding Centerpiece:


In our Home:
So before you throw out your DIY wedding decorations, embrace your inner pack-rat and use them as inspiring home decor!

-M.

Monday, July 16, 2012

Dog Portrait Tutorial


I was recently commissioned to do a portrait of an adorable pup named Fergus.  I thought I would share the progress as Fergus' portrait comes to life!
This is the photo I received as reference:
First, I made a pot of coffee. After staring a the photos and making a plan of attack, I started by creating a line sketch on tracing paper. I liked the ears from another reference photo so I sketched those. 
 I like using graphite transfer paper to get my sketch onto my canvas.  By using graphite paper you only have to sketch once, and you don't have to worry about erasing on the canvas.  I like Sally's Graphite paper


Once the sketch is on the canvas, I start by using my dark colors.  You can always lighten oil paints because they are transparent.
 Continue to build the dark areas and blend lighter colors as you go.
 Once a base was down, I went back with heavier dark colors to build shadows and contours
 Blend. Blend. Blend.
 Once we get to this point it's time to stop until it dries.  By letting this paint dry, we can layer paint on top, without having it blend. Oil paints take about 4-6 days to dry, depending on the moisture in the air.  Oils take even longer if you use a thinning medium such as Turpentine (1-2 weeks!).

 Once he's dry we can go back to adding darks to the nose/mouth
Painting eyes can be very scary. It's all about layers! Start with the basics, black pupil, brown iris, reflection highlights. Around the eyes, this little guy has dark fur. Add it. It will look really dark and awkward but remember we blend and layer everything!

 Adding darks around the nose/mouth
 Reference check! Notice how light his face is in the picture? We will get there, but we start dark and work towards the light.  Before we finish, a fluffy brush can help soften all the colors. I can't do more to the face until it dries (4-6 days) so on the the body!
 Don't forget the bandanna!
 Starting to bring in the whites in the face

With the basic colors of the body and bandana down, it's time once again to let him dry.

 After 2 weeks of drying, I went back to start lightening his face and body.  Don't be afraid to be aggressive with the paint, you will need to blend it anyways! My client sent me several photos and wanted to "blend" the looks.  When all is done, the painting will not be as light as the photo.

Adding the darks around the eyes was a challenge. I used a fine brush to add lines of color and then blended it with a feathery brush.
 Next step was to work on the nose.
 Use white to add the "wet nose" look

 Almost done! just have to finish the background, lighten his face a little more, and add details (whiskers, hair detail, finish bandanna).

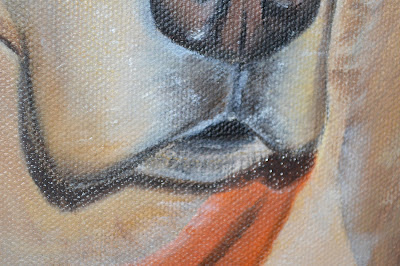
 Some close-ups:


Thursday, July 12, 2012

DIY is for the Birds


Have you ever looked at a bird's nest and said "wow, how do they make it looks so cozy?  I would totally sleep there."  I have.  We have nests in the yard that are made out of all kinds of cozy items; grass, dog hair, dryer lint, and moss. 
This quick DIY craft tutorial will let you help the birds make comfy, cozy nests.

A while ago, I thought I would learn how to crochet.  I even started to crochet a blanket...it was going to be beautiful. However, after about year, the "blanket" only had four rows of stitching.  After we moved, I found the "blanket" and decided I would finally finish. That dream ended when I realized my darling cat got to it first...

My Blanket...:

So how does my blanket tragedy help the little birds in the yard?  Well friends, we are going to donate the yarn to the nest builders of the world.

What you'll need:
Pile of yarn from left-over crafts or failed crochet blankets
Scissors
Metal suet feeder

First I finished what my cat had started and pulled the yarn until I had a pile.


I wanted to cut the yarn into small strings that could be carried easily by my flying friends.
I found that if I wrapped the string around my hand I could cut at one point and have all the strings the same size.


 Once the yarn was cut I simply had to add it the the suet holder.


Now all you have to do is look for your yarn to be featured in a comfy, cozy nest!

-M.
Related Posts Plugin for WordPress, Blogger...